1. SET UP YOUR PROTOTYPE STENCIL
Important: All work surfaces should be conductive and grounded.
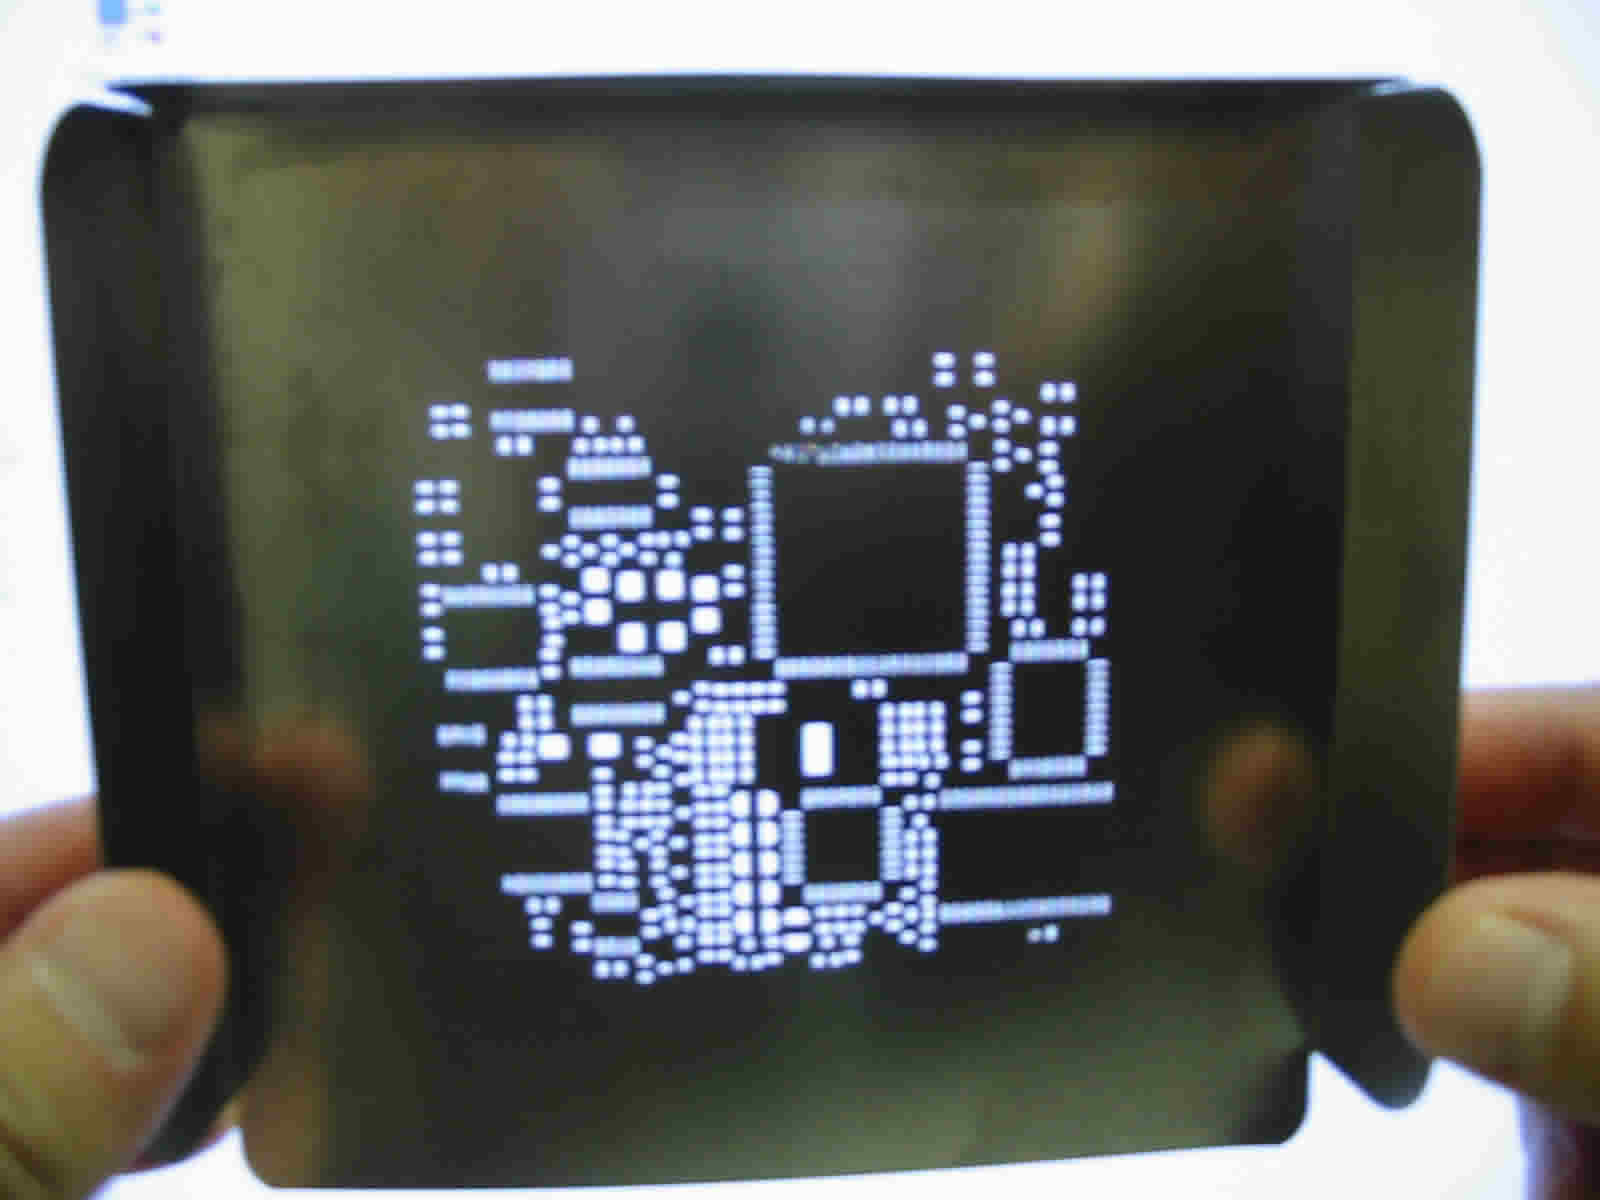
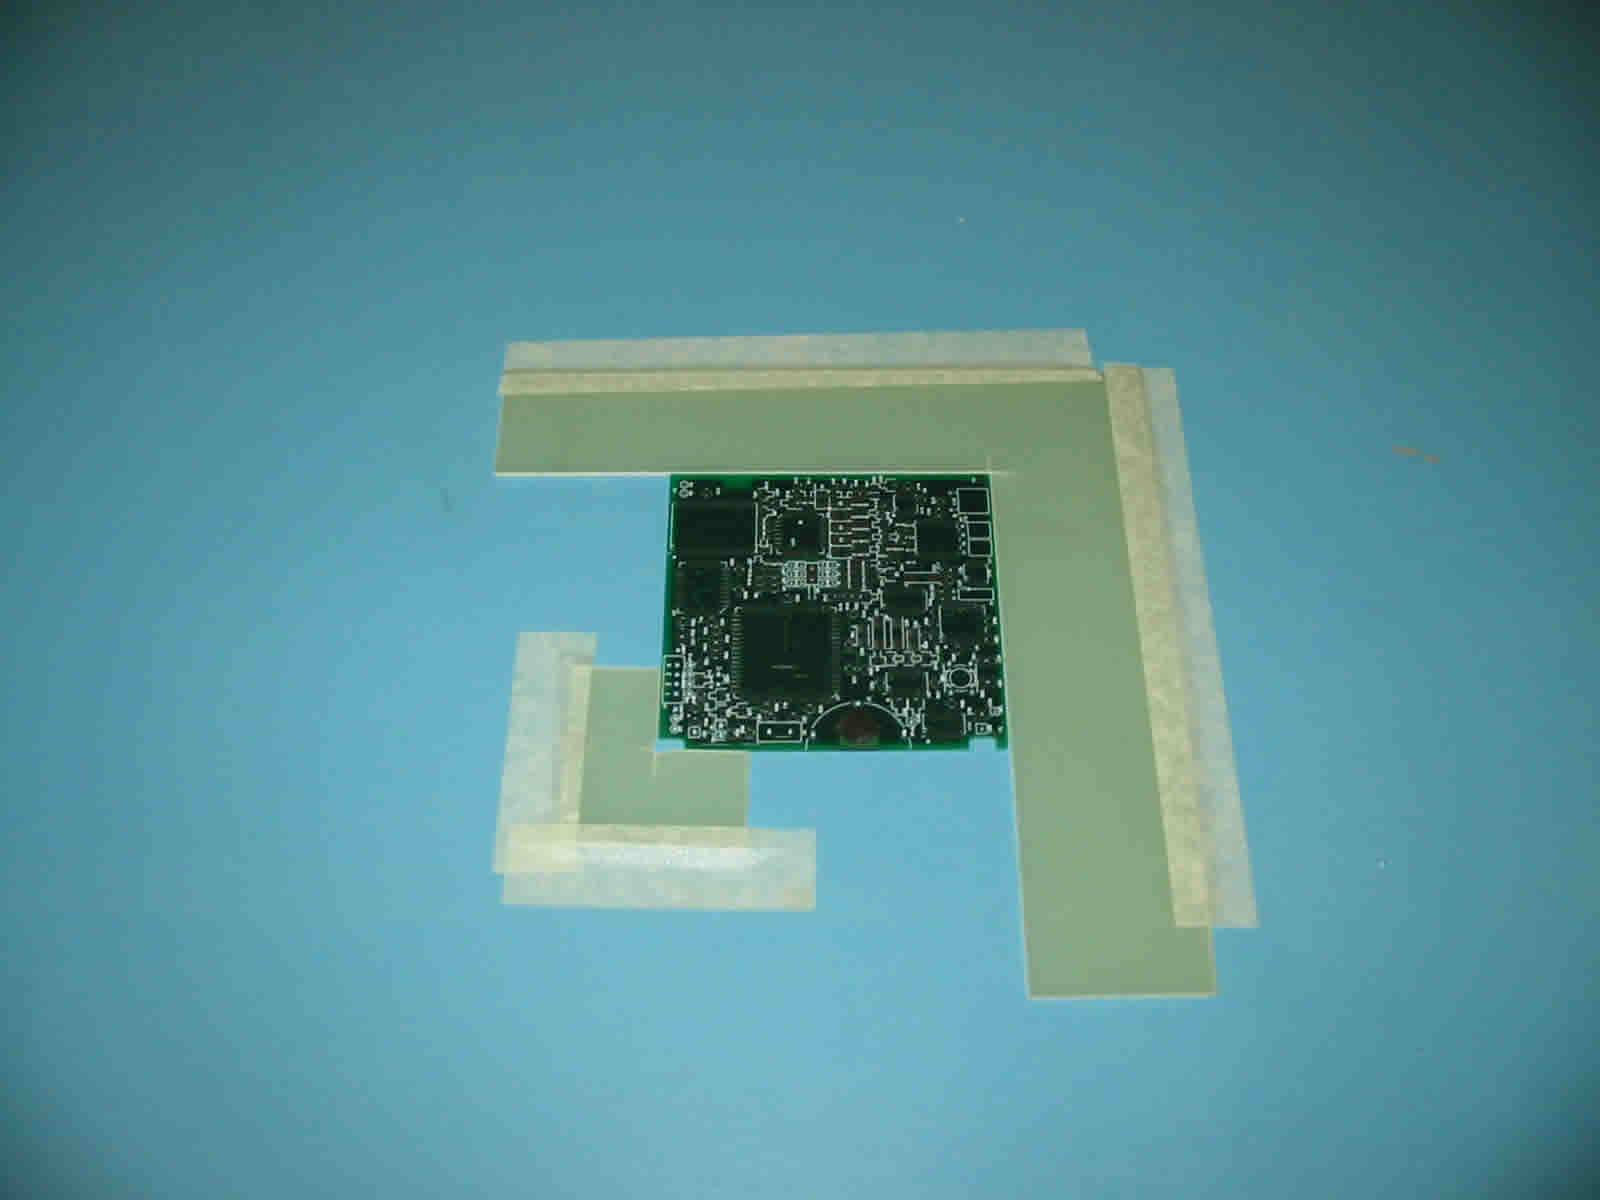
Prototype Stencil: The prototype stencil is a stainless steel foil (5 to 10 mils thick) with openings cut though to allow the solder paste to be deposited on to the PCB lands (Pads). To prevent the PCB from moving you can tape it down or you can make a smaller square and use it as indicated.
- Place the large L-shape board holder on a flat surface and tape it down to prevent it from moving.
- Place the PCB into the board holder.
- Place the small L-shape board holder next to the PCB and tape it down to prevent it from moving.
- Align the prototype stencil over the PCB SMT land pattern (SMT Pads) and tape it to large L-shaped board holder.

2. APPLY THE SOLDER PASTE USING YOUR PROTOTYPE STENCIL
Remember: If using refrigerated solder paste, be sure to remove it from refrigeration and let it warm to room temperature. Before printing with solder paste provided in a jar, stir it for five minutes. Do NOT store paste that is not delivered in a cold pack in a refrigerator.
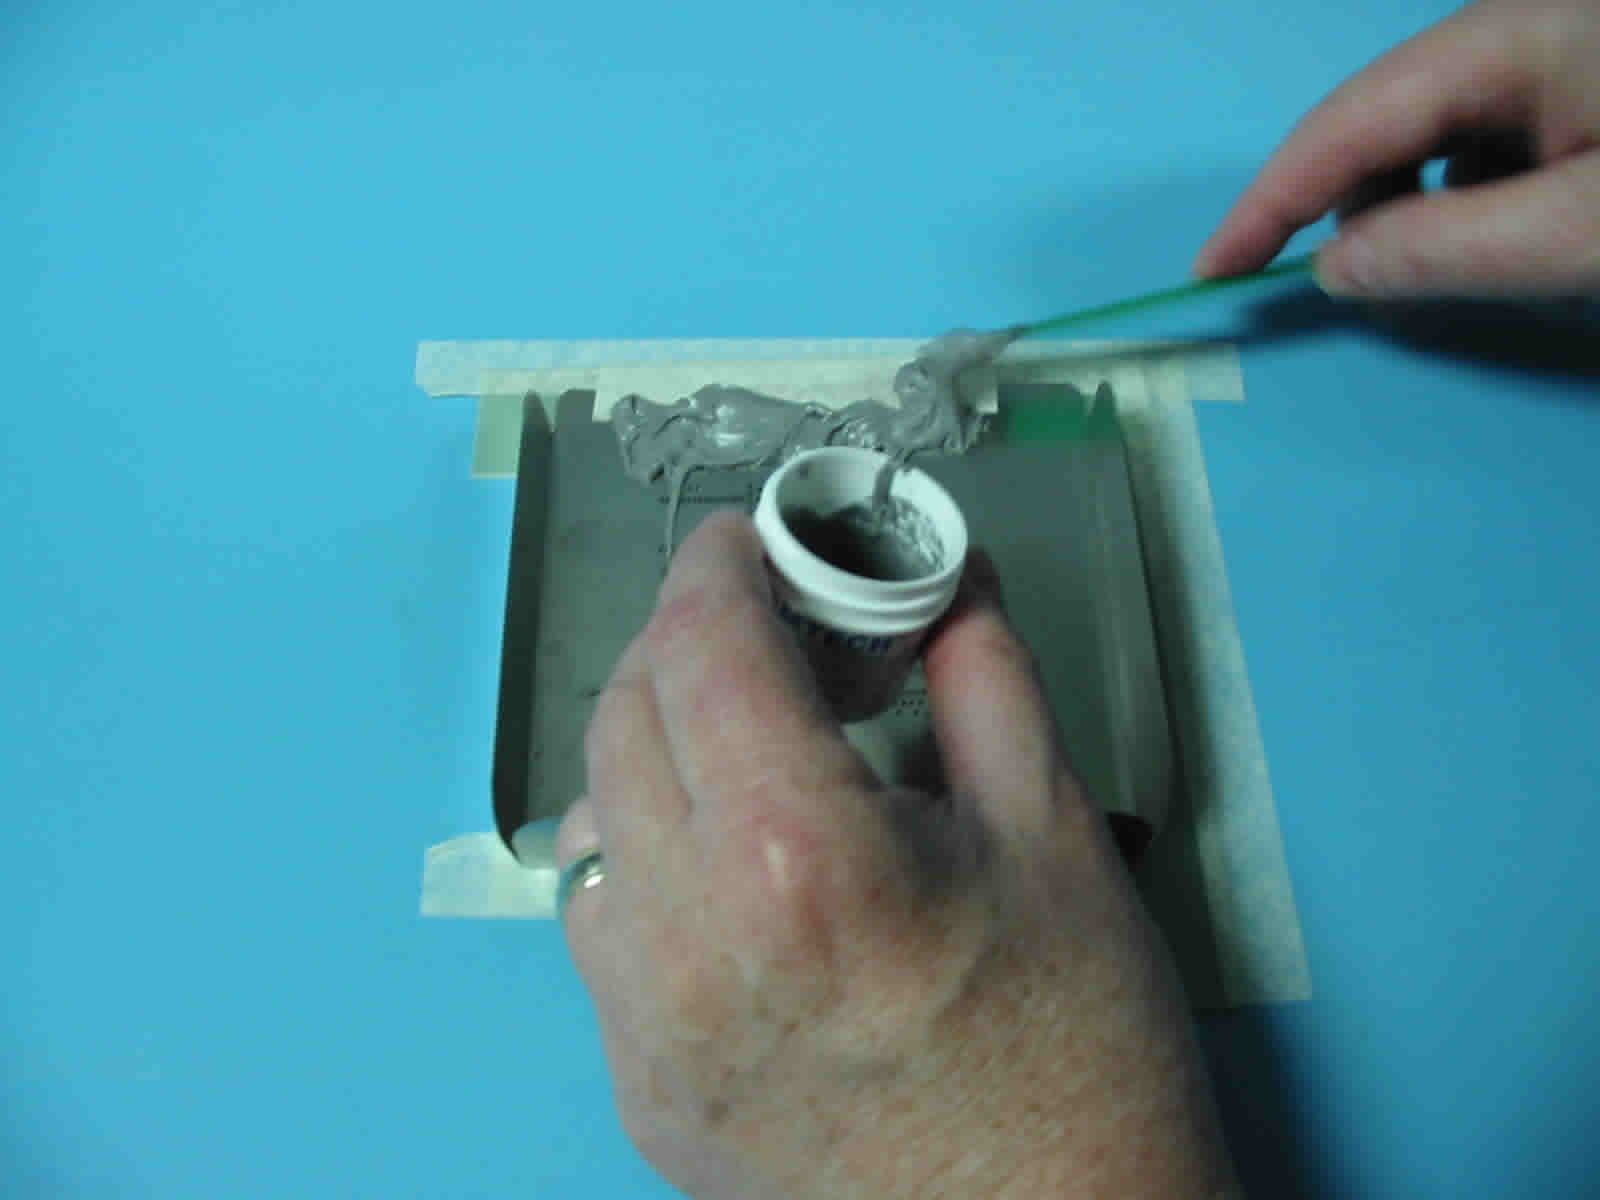
Place the solder paste on the prototype stencil to one side of the hole pattern. Spread the solder paste the full width of the hole pattern.
Squeegee: The squeegee is a flexible blade of stainless steel use to roll the solder paste over the prototype stencil forcing the solder paste thought the prototype stencil and on to the PCB lands.
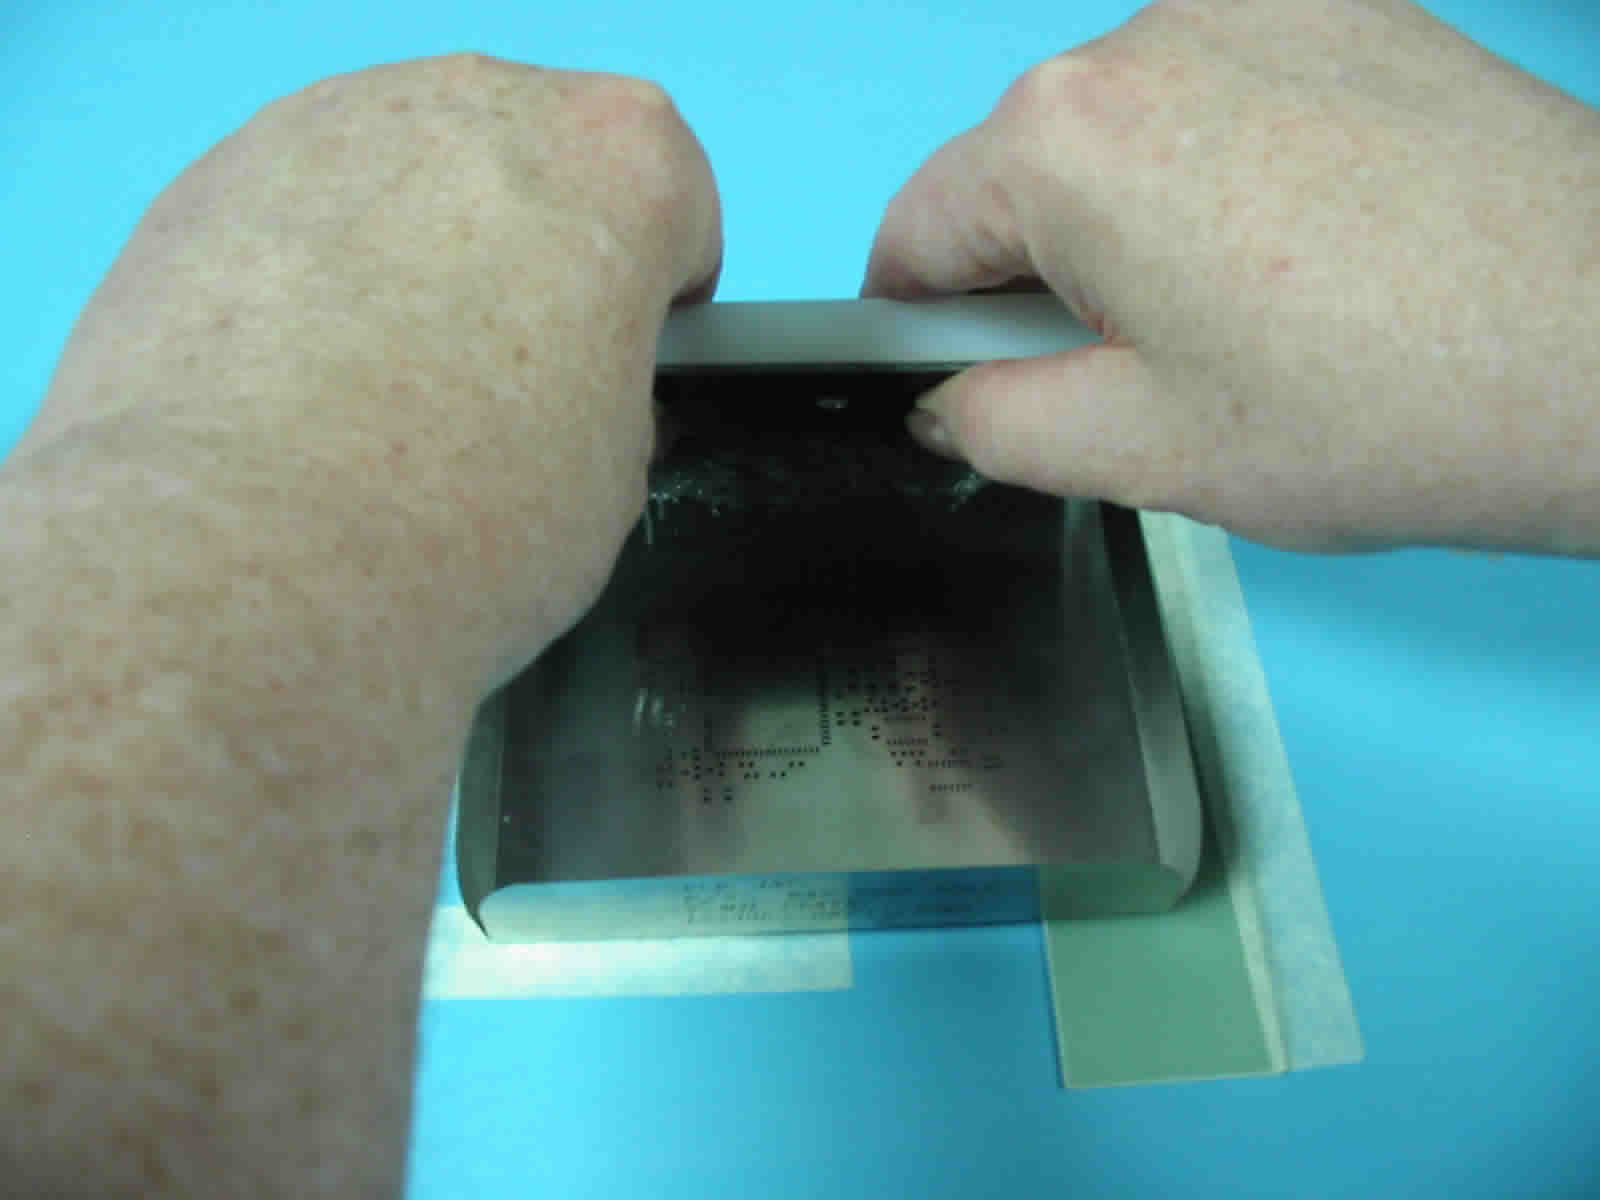
While holding the prototype stencil in contact with the PCB take the squeegee and place it on the prototype stencil outside the solder paste. *Tilt it 15 to 20 degrees from the vertical (toward the solder paste) and drag it and the solder paste across the hole pattern. Hold a light to medium pressure on the squeegee against the prototype stencil. Carefully lift the prototype stencil away (UP) from the PCB. *You may have to experiment a little to find the best angle for the type of solder paste you're using.
Inspect the solder paste print to ensure all the lands have solder paste on then and the paste is not smeared. If the print is not good, immediately use a spatula to remove the solder paste from the PCB. Clean the paste that remains on the PCB with alcohol and a clean rag. Let the PCB dry and print the solder paste again.
3. PLACE COMPONENTS
Important: Keep the time between printing the solder paste and placing the SMT parts on the solder paste short. The paste manufacturer can guide you on the maximum time between printing and placement.
Place the SMT parts on the PCB using tweezers or hand-held vacuum placement tool. (use a magnifying glass, if needed to align fine pitch leads to the land pattern.)

4. USING REFLOW TEMPERATURE INDICATORS.
There are two reasons to use a temperature indicator: First, to create good solder joints solder paste has to reflow or melt at a certain temperature and stay at that temperature (liquidous) for a given amount of time. When you buy your paste, this information is provided by the solder vendor. Next, your SMDs are temperature sensitive, so you want to know how long they can be exposed to the reflow or melt temperature without damage. A temperature indicator is designed to tell you this by the way it reacts within the oven.
There are several types but the one that I use looks like a big crayon. I use this to make a mark on the board.
Some of these are hard to mark with, so I often just shave off a tiny bit of flakes onto the board with a knife tip. You might want to slice a small piece off. Either way works fine. It melts at the specified temperature.
Different temperature indicators have different colors. For this process the indicators marks are light in color. They look a little like dust on the board - a little like flakes of talcum powder. When they melt they slump and change color. This particular one goes from light pink in color to clear red, so it's easy to see. Obviously, it has to be near the window of the toaster oven where you can readily see the change.
Keywords:
SMT Assembly Line Screening, SMD PICk And Place Machine, PCB PICk And Place Machine, LED PICk And Place Machine, Desktop PICk And Place Machine, PICk And Place Machine SMT, SMD PICk And Place Mini Machine, Router Working PCB, PCB Router Vision, 3018 PCB CNC Router, CNC 3020 Router PCB, CNC Router Machine PCB, Solid Carbide Cone Engraving PCB Router Drill Bits
I.C.T is a manufacturer of SMT machines. It mainly provides customers with SMT production lines including SMT Stencil Printers, Pick and place machines, Reflow Oven, AOI Machine, Wave Soldering Machine and PCB Handling Machine etc. I.C.T has more than 25 researches on SMT and DIP technology, for the world Customers provide SMT total solutions. There are successful cases of SMT technical team in Asia, Europe, America, Africa, and Australia.
I.C.T provide SMT solutions at various stages according to the different needs of customers. I.C.T is not only a provider of SMT equipment and technology, but also is the customer's escort in the field of SMT and DIP.
Welcome more people to discuss with us about SMT technologies and solutions, please contact us for more information:
Tel: +86 13670124230 (WhatsApp/Skype/WeChat)
Email: etasmt@foxmail.com